이번 게시물은 이론으로만 배웠던 ViewModel을 실제로 적용해서 0~100사이의 숫자 값을 넣을 수 있는 어플을 만들었다.
리모콘의 볼륨 조절같은 기능이라고 생각하면 될 것 같다.
이번 예제를 따라하기 전에 기초 지식으로 아래 두 게시물 내용을 알고 있다면 무리없이 따라할 수 있을 것이다.
[안드로이드 스튜디오 정리#15] View Model, Live Data
이 게시물은 다음 링크를 참조하여 학습했습니다. Android 아키텍처 구성요소 | Android 개발자 | Android Developers 앱 작업 developer.android.com ViewModel 개요 | Android 개발자 | Android Develop..
seminzzang.tistory.com
[안드로이드 스튜디오 정리#14] Data Binding
이 게시물은 다음 링크를 참조하여 학습했습니다. 데이터 결합 라이브러리 | Android 개발자 | Android Developers 데이터 결합 라이브러리 Android Jetpack의 구성요소. 데이터 결합 라이브러리는 프로그
seminzzang.tistory.com
ViewModel을 넣어서 MVVM 패턴을 완벽하게 적용해보고 싶었는데, DB가 되는 Model이 없어서 완벽한 MVVM 패턴을 적용했다고 보긴 어려울 것 같다.
후에 Room을 배우고 어플의 기능을 더 추가해서 새로운 버전을 만들려고 한다.
또한, MVVM패턴에 대해서도 깔끔하게 정리된 게시물을 작성하려 한다.
1. activity_main
|
1
2
3
4
5
6
7
8
9
10
11
12
13
14
15
16
17
18
19
20
21
22
23
24
25
26
27
28
29
30
31
32
33
34
35
36
37
38
39
40
41
42
43
44
45
|
<?xml version="1.0" encoding="utf-8"?>
<layout
xmlns:android="http://schemas.android.com/apk/res/android"
xmlns:app="http://schemas.android.com/apk/res-auto"
xmlns:tools="http://schemas.android.com/tools">
<data>
<variable
name="mainViewModel"
type="com.example.viewmodelexamplekt.MainViewModel" />
</data>
<LinearLayout
android:layout_width="match_parent"
android:layout_height="match_parent"
tools:context=".MainActivity"
android:orientation="vertical"
android:gravity="center">
<TextView
android:id="@+id/tv_test"
android:layout_width="wrap_content"
android:layout_height="wrap_content"
android:textSize="30dp"
android:layout_margin="10dp"/>
<LinearLayout
android:layout_width="wrap_content"
android:layout_height="wrap_content">
<Button
android:id="@+id/btn_minus"
android:layout_width="wrap_content"
android:layout_height="wrap_content"
android:text="MINUS"
android:onClick="@{() -> mainViewModel.decrease()}"/>
<Button
android:id="@+id/btn_plus"
android:layout_width="wrap_content"
android:layout_height="wrap_content"
android:text="PLUS"
android:onClick="@{() -> mainViewModel.increase()}"/>
</LinearLayout>
</LinearLayout>
</layout>
|
cs |
레이아웃은 데이터 바인딩을 위해 <layout>태그를 상단에 추가하였고, Button의 onClick 이벤트에 ViewModel에서 만든 메서드를 넣어주었다.
2. MainViewModel
|
1
2
3
4
5
6
7
8
9
10
11
12
13
14
15
16
17
18
19
20
21
22
23
|
package com.example.viewmodelexamplekt
import androidx.lifecycle.LiveData
import androidx.lifecycle.MutableLiveData
import androidx.lifecycle.ViewModel
class MainViewModel : ViewModel(){
private var _num = MutableLiveData<Int>()
val num: LiveData<Int>
get() = _num
init{
_num.value = 50
}
fun increase(){
_num.value = _num.value?.plus(1)
}
fun decrease(){
_num.value = _num.value?.minus(1)
}
}
|
cs |
ViewModel 클래스는 숫자를 저장하기 위한 LiveData 변수와 LiveData를 수정하기 위한 MutableLiveData를 넣어주었다.
초기값은 50으로 초기화했고, 버튼을 누를때마다 +,- 1이 되도록 만들었다.
3. MainActivity
|
1
2
3
4
5
6
7
8
9
10
11
12
13
14
15
16
17
18
19
20
21
22
23
24
25
26
27
28
29
30
31
32
33
34
35
36
37
|
package com.example.viewmodelexamplekt
import androidx.appcompat.app.AppCompatActivity
import android.os.Bundle
import androidx.activity.viewModels
import androidx.lifecycle.Observer
import com.example.viewmodelexamplekt.databinding.ActivityMainBinding
class MainActivity : AppCompatActivity() {
private lateinit var mBinding: ActivityMainBinding
val binding get() = mBinding!!
val viewModel: MainViewModel by viewModels()
override fun onCreate(savedInstanceState: Bundle?) {
super.onCreate(savedInstanceState)
mBinding = ActivityMainBinding.inflate(layoutInflater)
setContentView(binding.root)
mBinding.mainViewModel = viewModel
viewModel.num.observe(this, Observer {
binding.tvTest.text = it.toString()
checkBtnState(it)
})
}
fun checkBtnState(it:Int){
if(it==0) binding.btnMinus.isEnabled = false
else if (it==100)binding.btnPlus.isEnabled = false
else{
binding.btnPlus.isEnabled = true
binding.btnMinus.isEnabled = true
}
}
}
|
cs |
데이터바인딩 객체를 초기화하고, 레이아웃의 데이터에 ViewModel을 연결시켜 주었다.
옵저버를 통해 LiveData가 변하는지 확인하고, LiveData가 변할 때 TextView의 text를 변경시켜 주었다.
LiveData의 값이 0부터 100까지만 될 수 있도록 0 or 100이 될 때 버튼을 비활성화 시켜주었다.
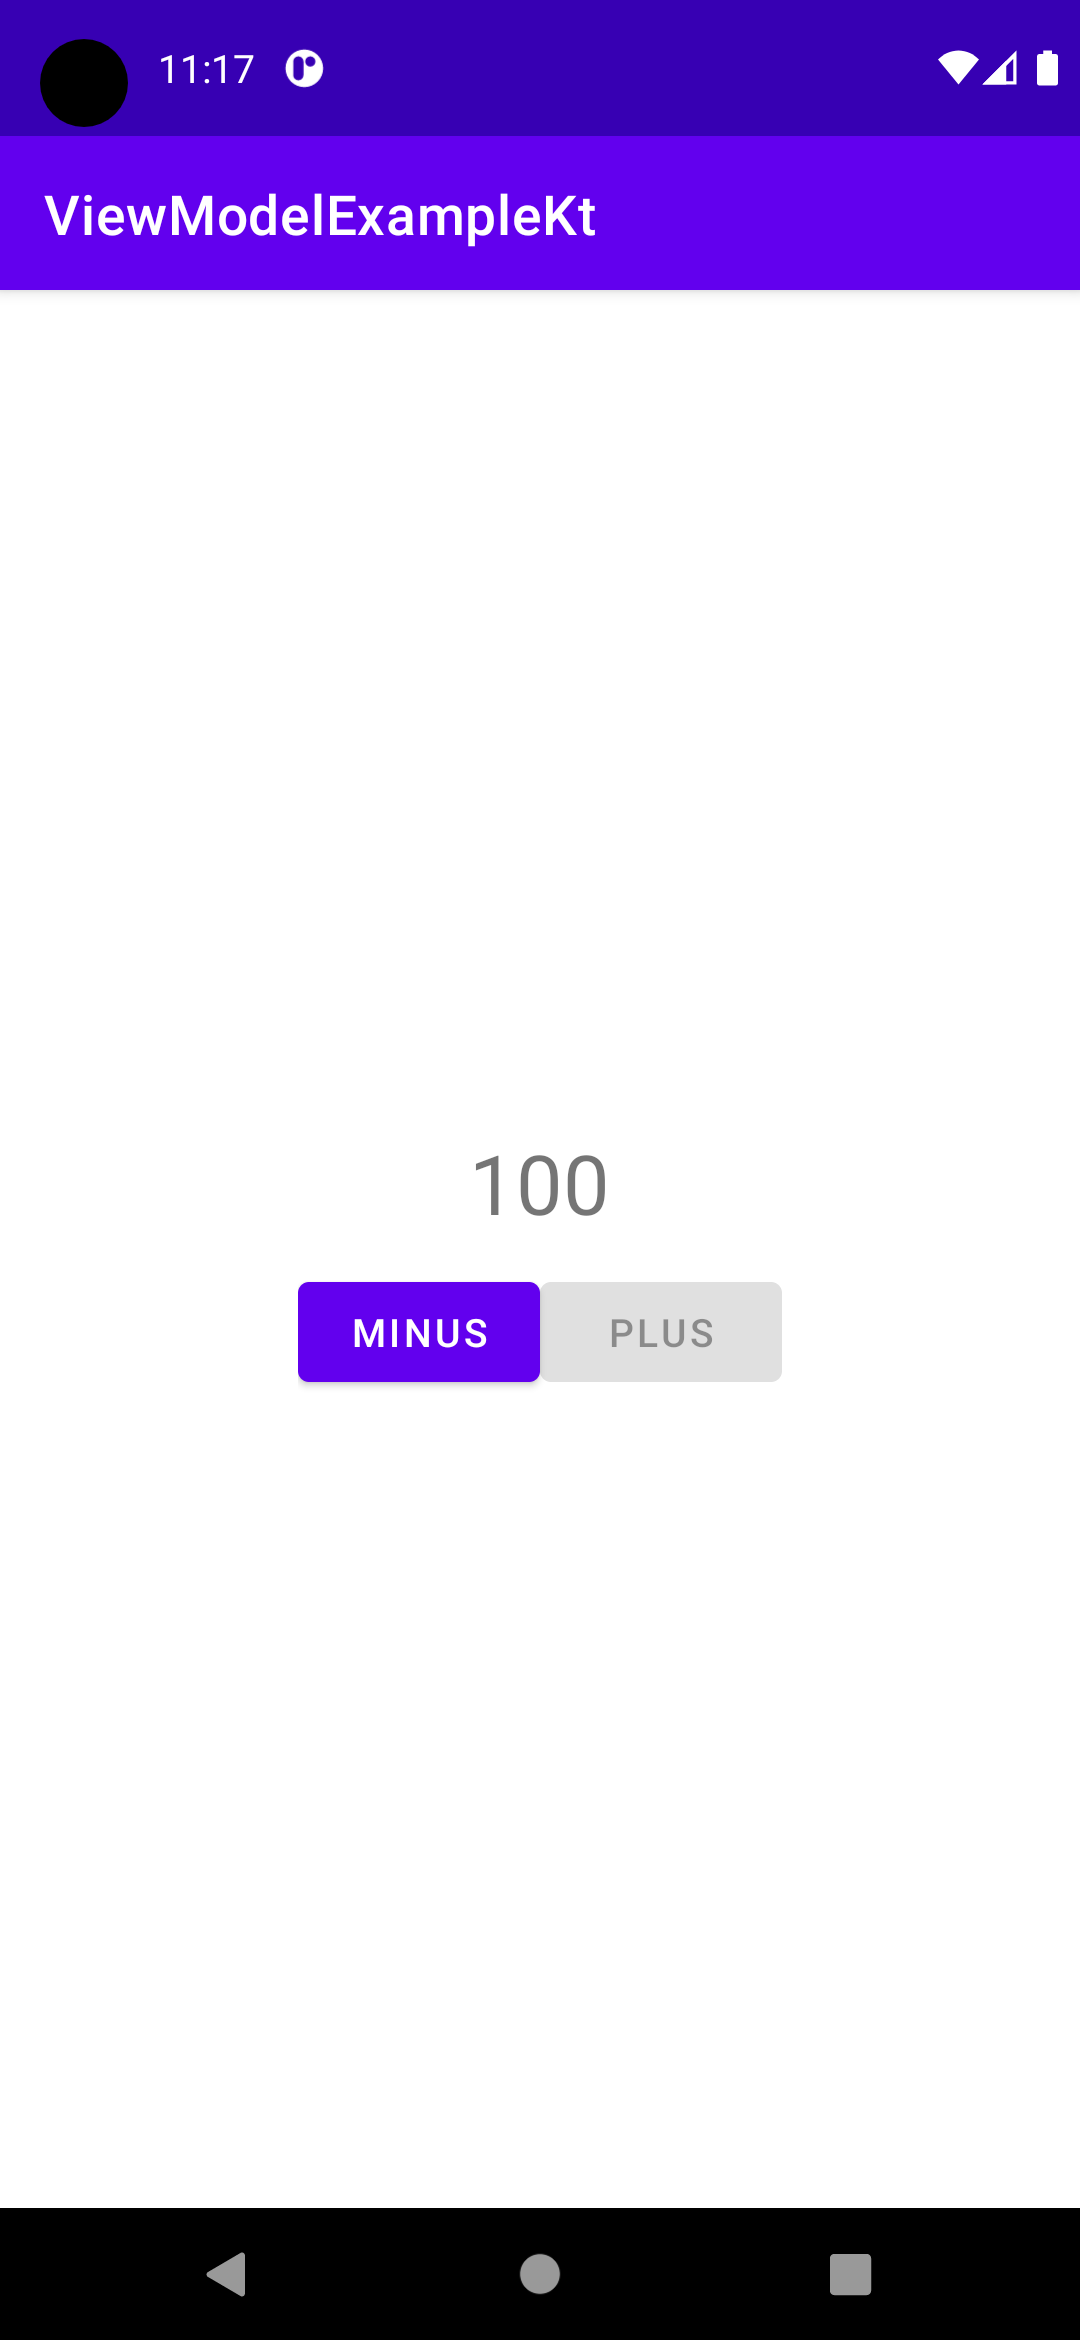
4. 결과물
초기화면은 초기값으로 설정한 50으로 시작한다.

MINUS버튼을 누르면 숫자가 1 감소하고,
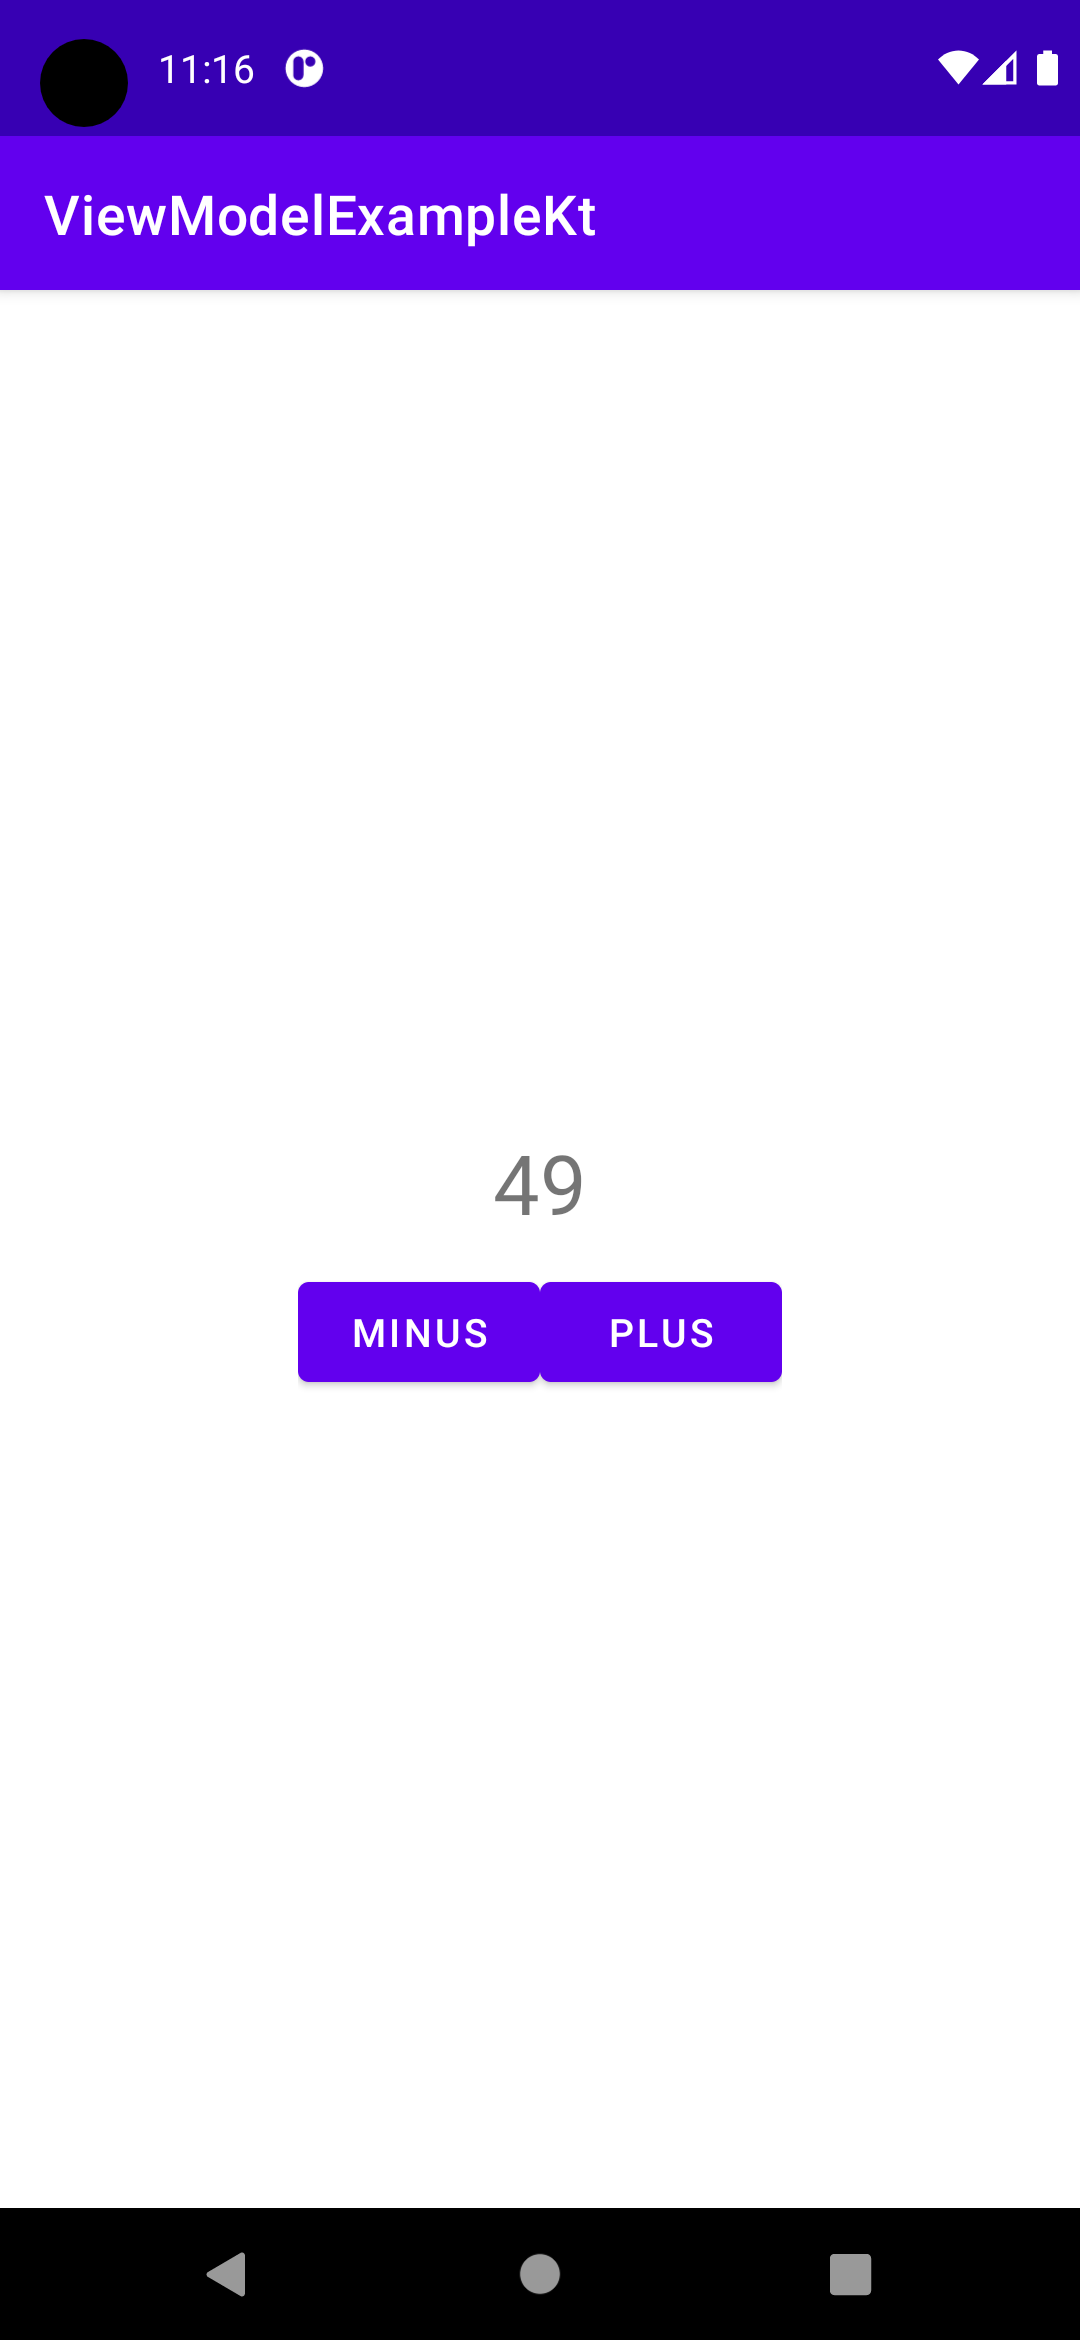
PLUS버튼을 누르면 숫자가 1 증가한다.

숫자가 0일때 MINUS버튼이 비활성화 되고,
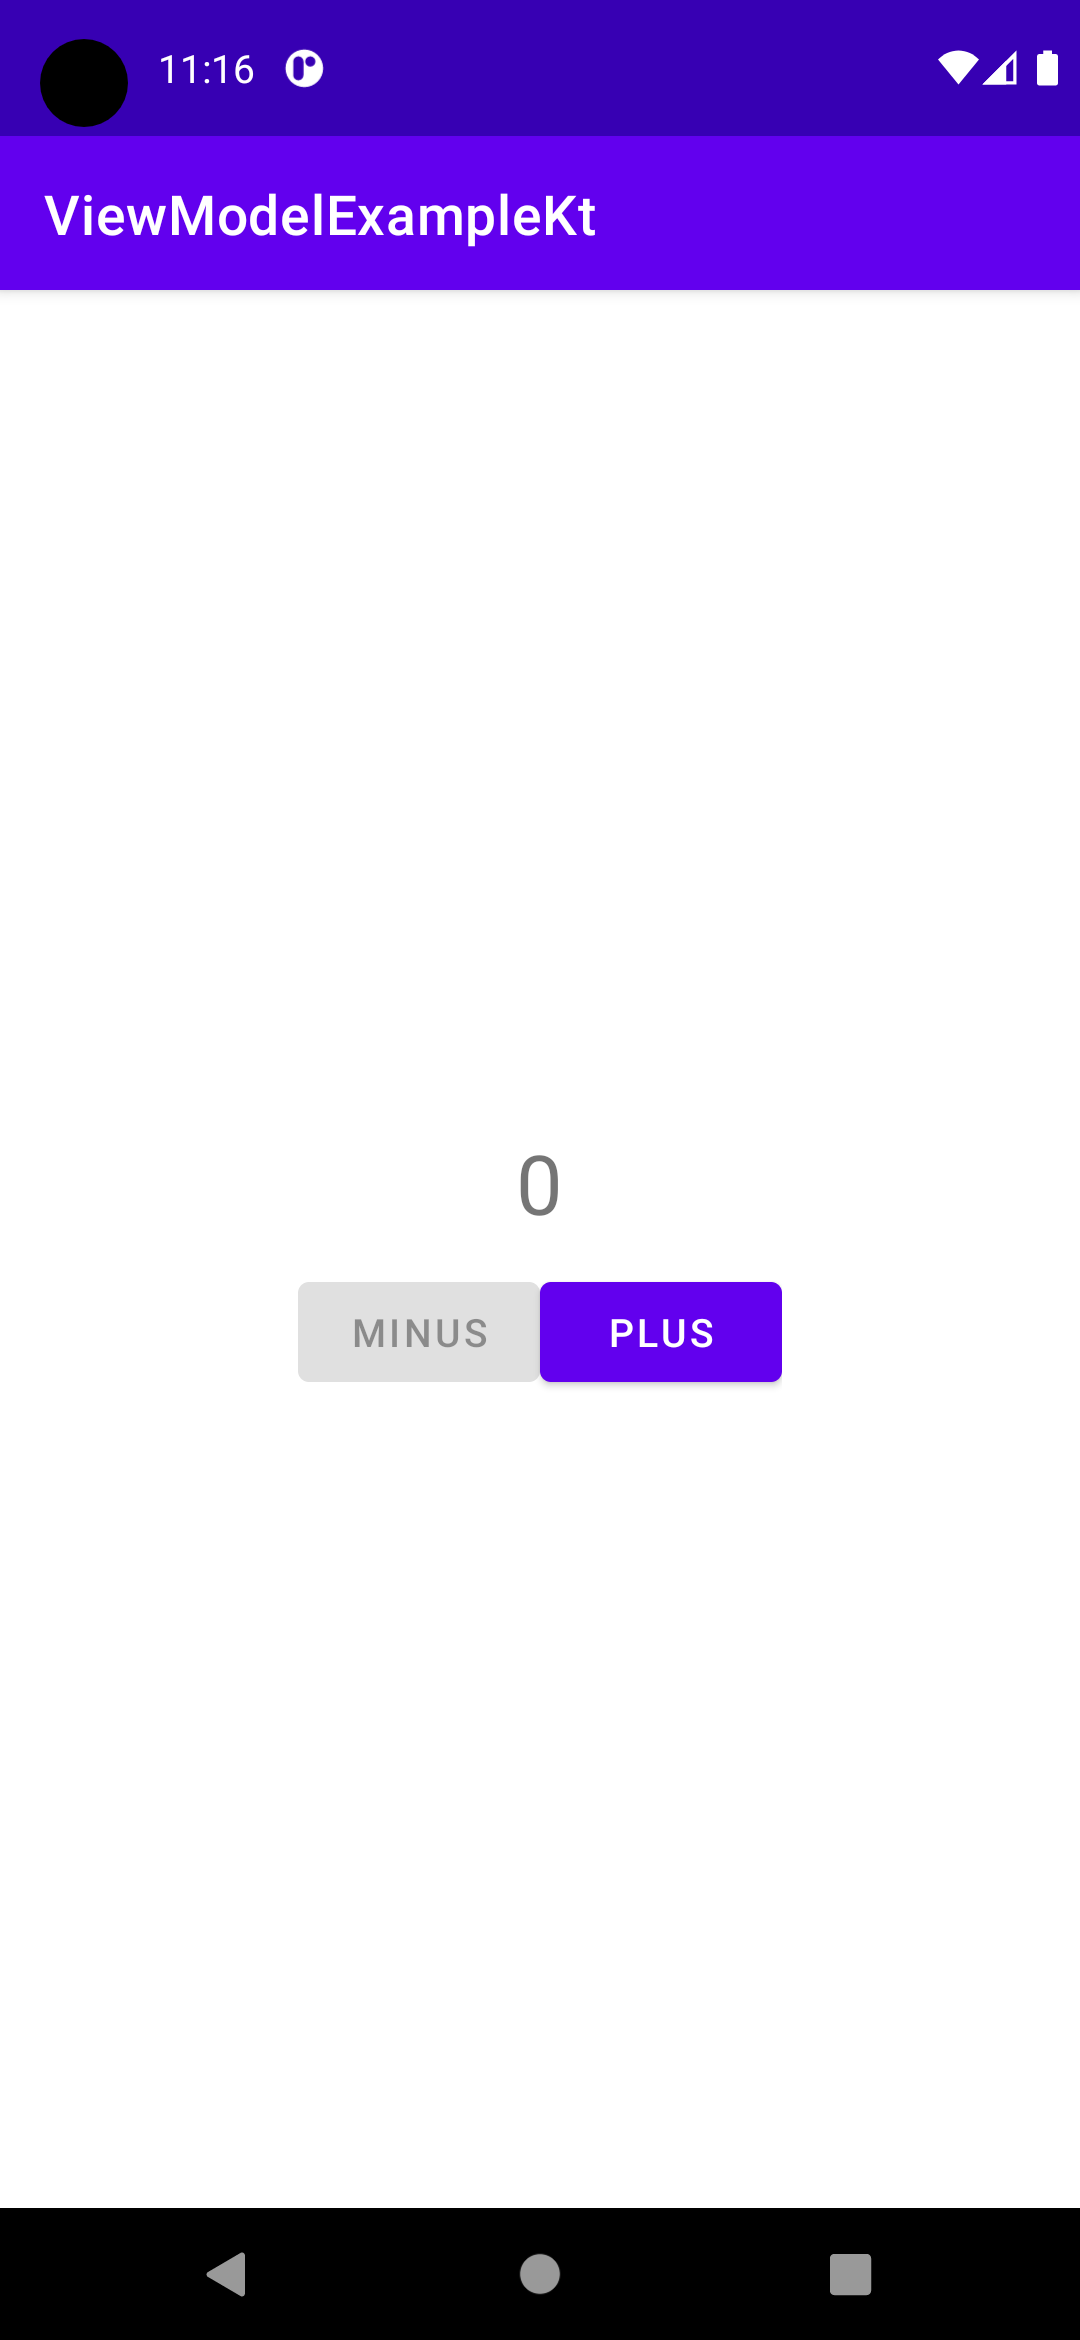
숫자가 100일때 PLUS버튼이 비활성화 된다.
간단하게 ViewModel을 사용해서 숫자를 조작하는 버튼을 만들어봤다.
완벽하게 이해했다 생각하고 어플을 만들기 시작했는데, 내 생각과 달리 잘못 이해한 부분이 있어서 많이 헤맸던 것 같다.
이 어플을 계기로 ViewModel에서 이해한 내용을 바탕으로 MVVM 패턴에 대해서 한번에 정리될 수 있는 게시물을 작성해야겠다.
'Legacy' 카테고리의 다른 글
| [안드로이드 스튜디오 독학#48] Retrofit + ViewModel + Coroutine (0) | 2022.02.03 |
|---|---|
| [안드로이드 스튜디오 독학#47] RecyclerView + ViewModel + DataBinding (0) | 2022.01.25 |
| [안드로이드 스튜디오 정리#15] View Model, Live Data (0) | 2022.01.21 |
| [안드로이드 스튜디오 정리#14] Data Binding (0) | 2022.01.19 |
| [안드로이드 스튜디오 정리#13] View Binding (0) | 2022.01.19 |