유튜브 채널 hongdroid홍드로이드님의 강의를 보고 학습했습니다.
hongdroid홍드로이드
안녕하세요 구디에서 신입 앱 개발자로서의 삶을 살아가고 있는 홍드로이드 라고 합니다. 이 채널에서는 IT 계열 앱 개발자는 도대체 어떻게 하루를 보낼까 하는 분들을 위해서 만들어졌습니다.
www.youtube.com
메인액티비티.xml
|
1
2
3
4
5
6
7
8
9
10
11
12
13
14
15
16
17
18
19
20
21
22
23
24
25
26
27
28
29
30
31
32
|
<?xml version="1.0" encoding="utf-8"?>
<LinearLayout xmlns:android="http://schemas.android.com/apk/res/android"
xmlns:app="http://schemas.android.com/apk/res-auto"
xmlns:tools="http://schemas.android.com/tools"
android:layout_width="match_parent"
android:layout_height="match_parent"
android:gravity="center"
tools:context=".MainActivity">
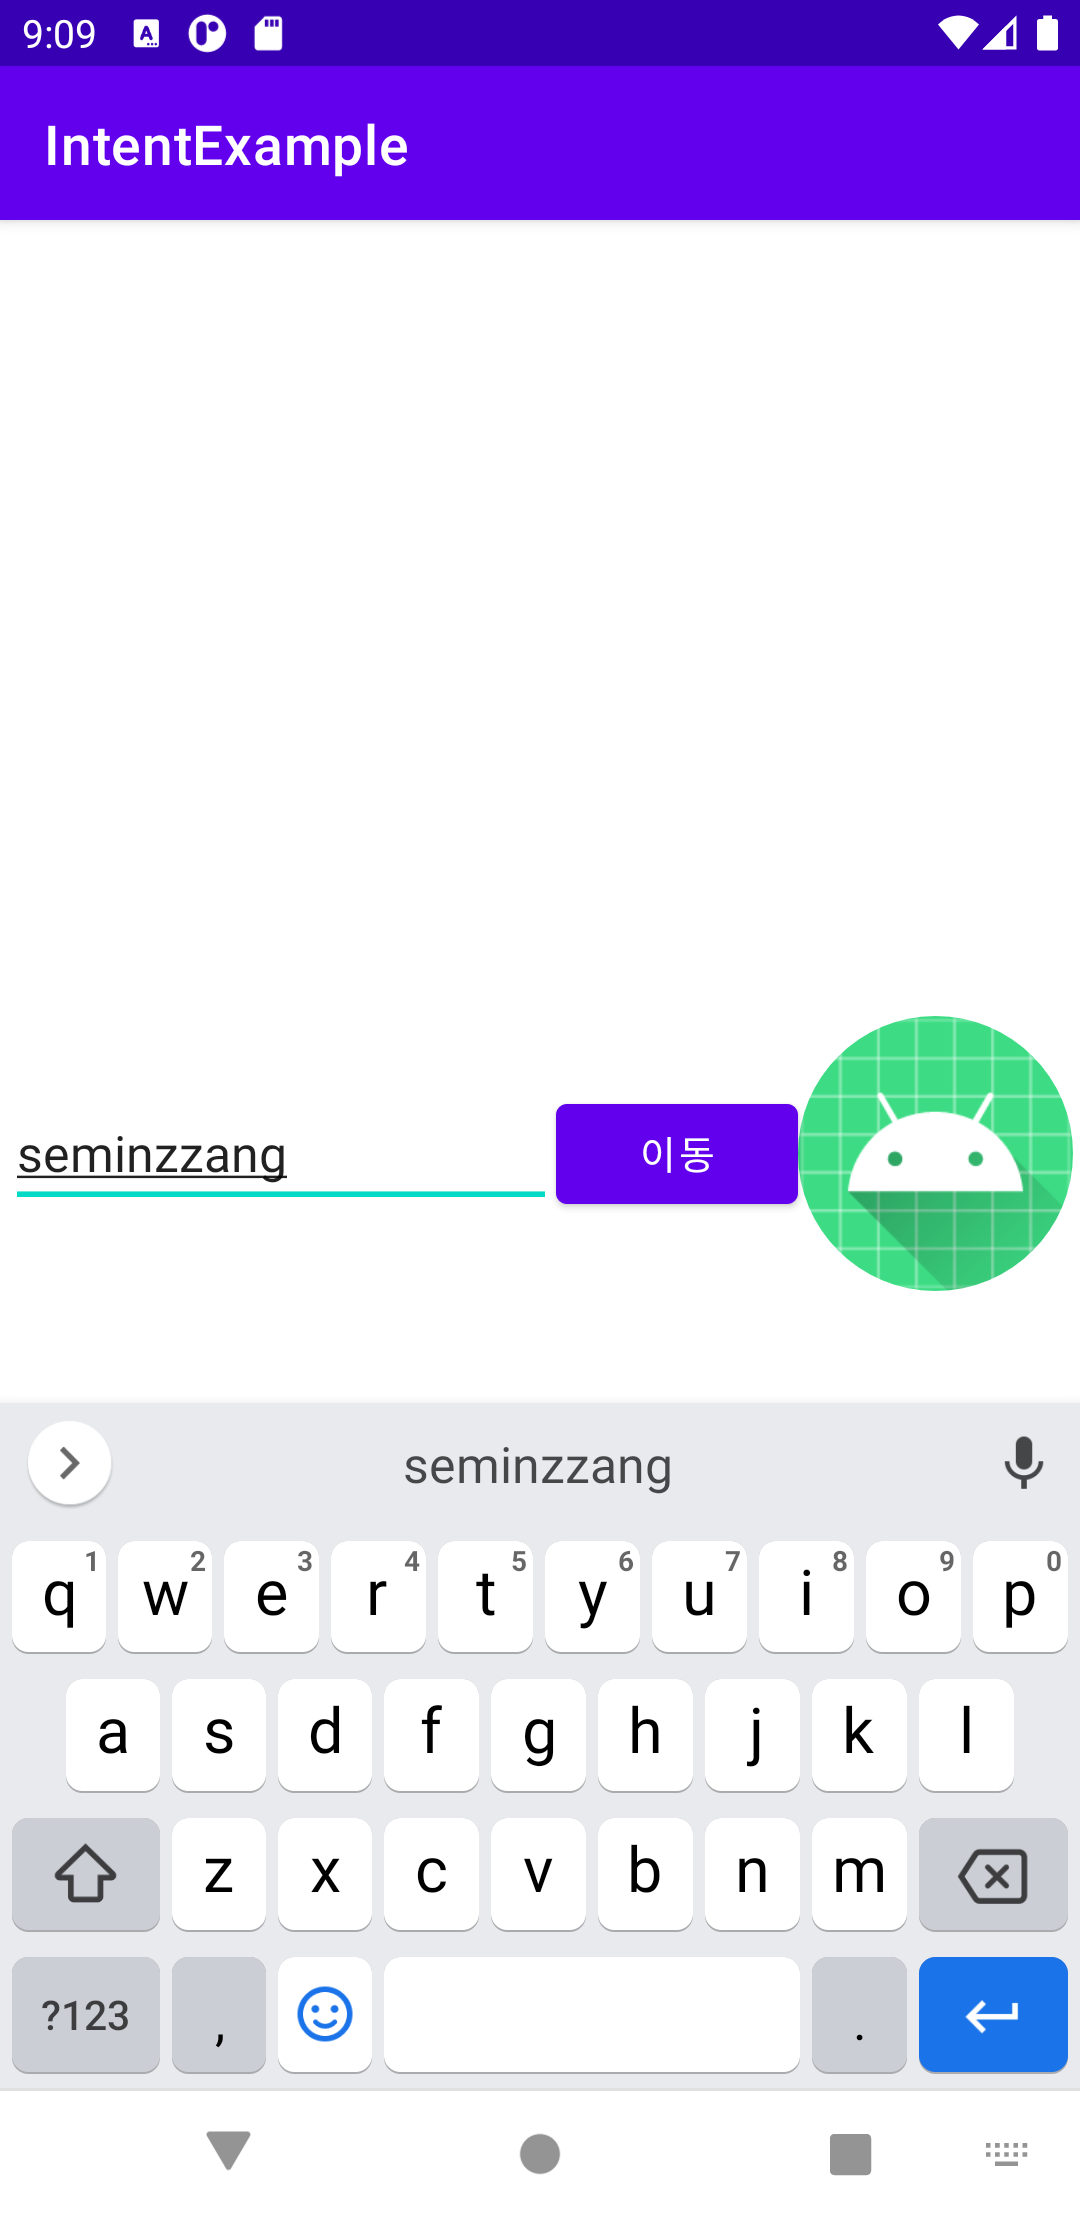
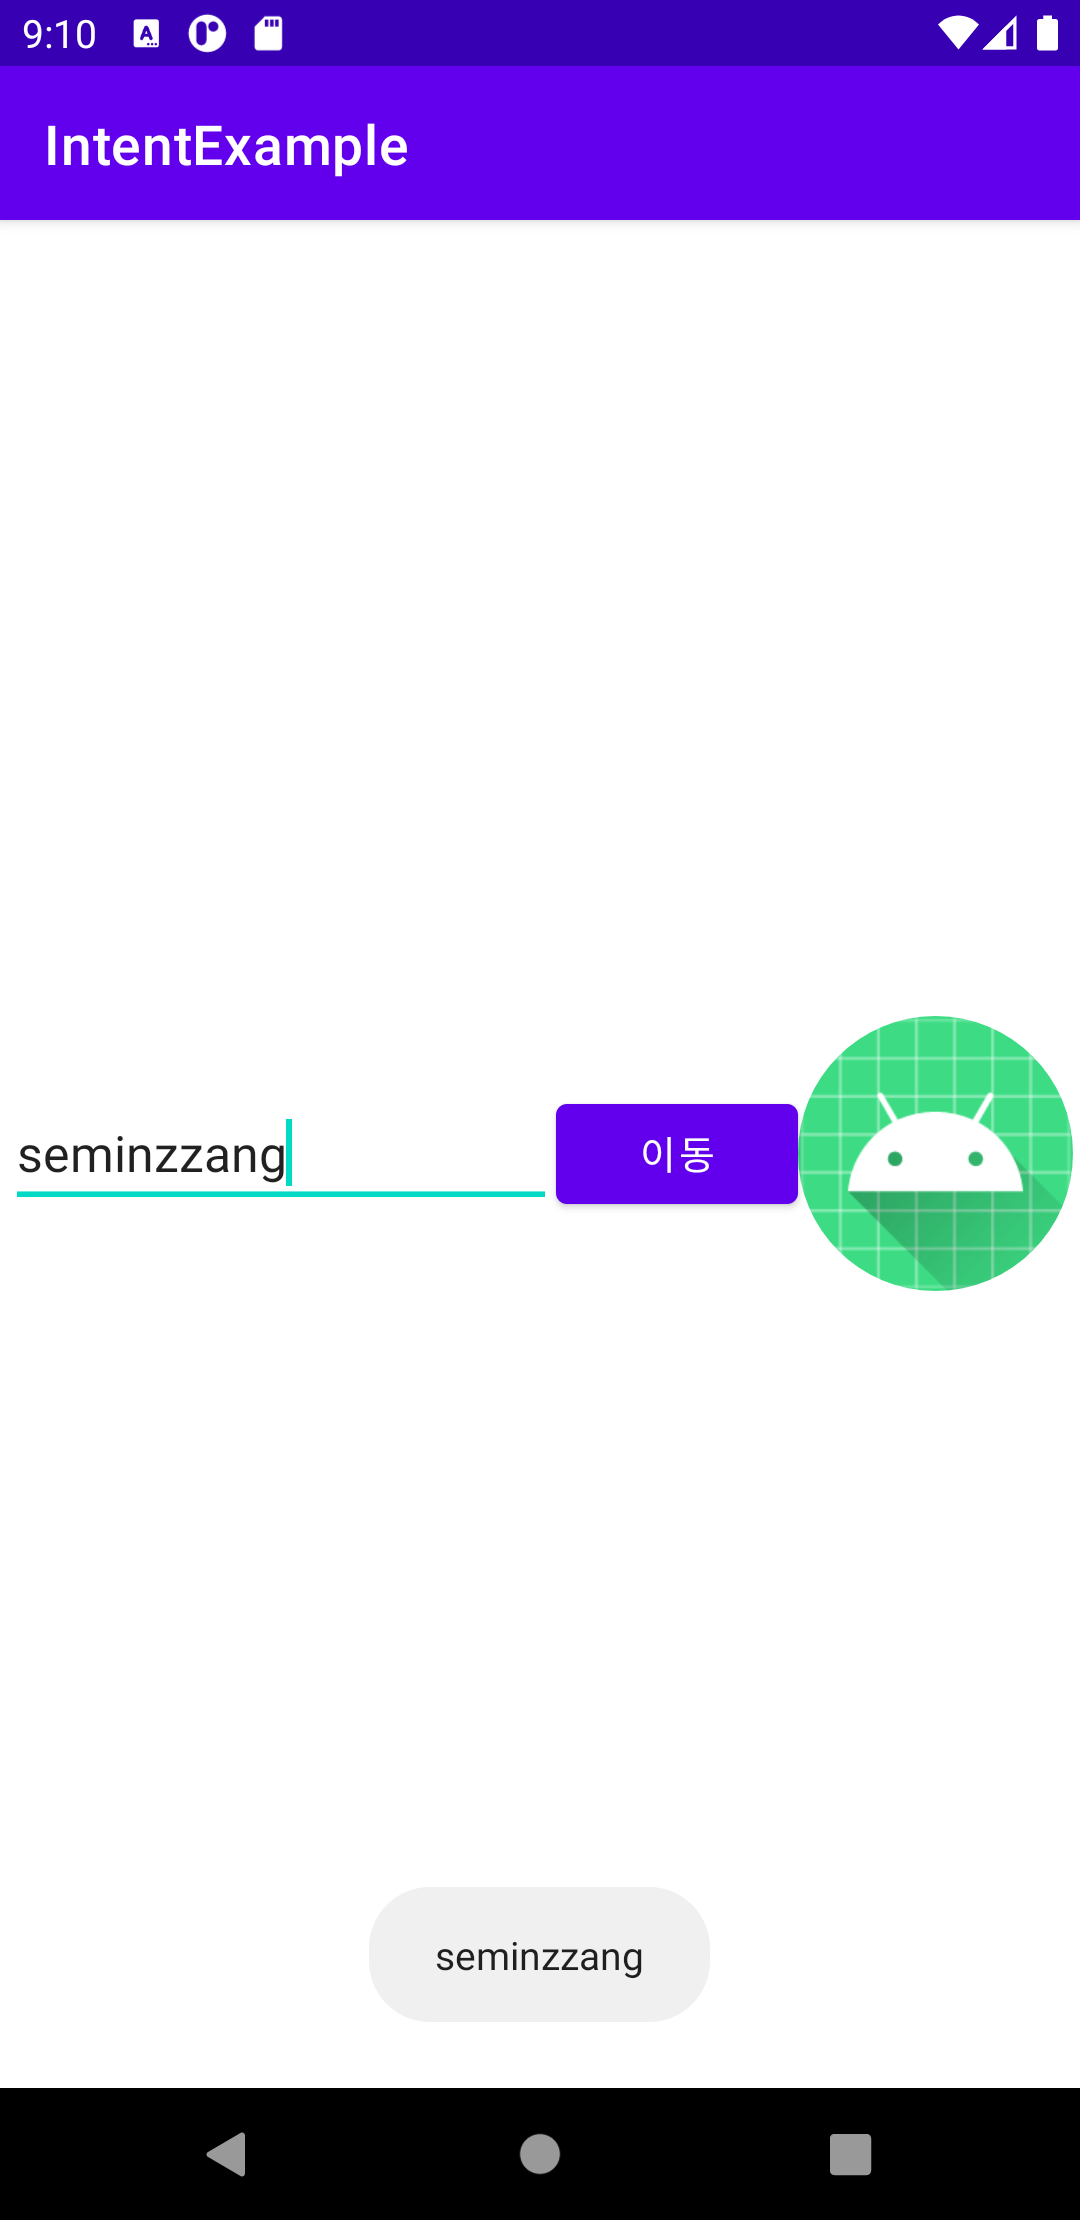
<EditText
android:id="@+id/et_text"
android:layout_width="200dp"
android:layout_height="wrap_content"
/>
<Button
android:id="@+id/btn_move"
android:layout_width="wrap_content"
android:layout_height="wrap_content"
android:text="이동"
/>
<ImageView
android:id="@+id/test"
android:layout_width="100dp"
android:layout_height="100dp"
android:src="@mipmap/ic_launcher"/>
</LinearLayout>
|
cs |
메인액티비티.java
|
1
2
3
4
5
6
7
8
9
10
11
12
13
14
15
16
17
18
19
20
21
22
23
24
25
26
27
28
29
30
31
32
33
34
35
36
37
38
39
40
41
42
43
44
45
46
|
package com.example.intentexample;
import androidx.appcompat.app.AppCompatActivity;
import android.content.Intent;
import android.os.Bundle;
import android.view.View;
import android.widget.Button;
import android.widget.EditText;
import android.widget.ImageView;
import android.widget.Toast;
public class MainActivity extends AppCompatActivity {
private Button btn_move;
private EditText et_text;
private String str;
private ImageView test;
@Override
protected void onCreate(Bundle savedInstanceState) {
super.onCreate(savedInstanceState);
setContentView(R.layout.activity_main);
et_text = findViewById(R.id.et_text);
btn_move = findViewById(R.id.btn_move);
btn_move.setOnClickListener(new View.OnClickListener() {
@Override
public void onClick(View v) {
str = et_text.getText().toString();
Intent intent = new Intent(MainActivity.this, SubActivity.class);
intent.putExtra("str",str);
startActivity(intent); //액티비티 이동
}
});
test = (ImageView)findViewById(R.id.test);
test.setOnClickListener(new View.OnClickListener() {
@Override
public void onClick(View v) {
Toast.makeText(getApplicationContext(),"seminzzang",Toast.LENGTH_SHORT).show();
}
});
}
}
|
cs |
서브액티비티.xml
|
1
2
3
4
5
6
7
8
9
10
11
12
13
14
15
16
17
|
<?xml version="1.0" encoding="utf-8"?>
<LinearLayout xmlns:android="http://schemas.android.com/apk/res/android"
xmlns:app="http://schemas.android.com/apk/res-auto"
xmlns:tools="http://schemas.android.com/tools"
android:layout_width="match_parent"
android:layout_height="match_parent"
tools:context=".SubActivity">
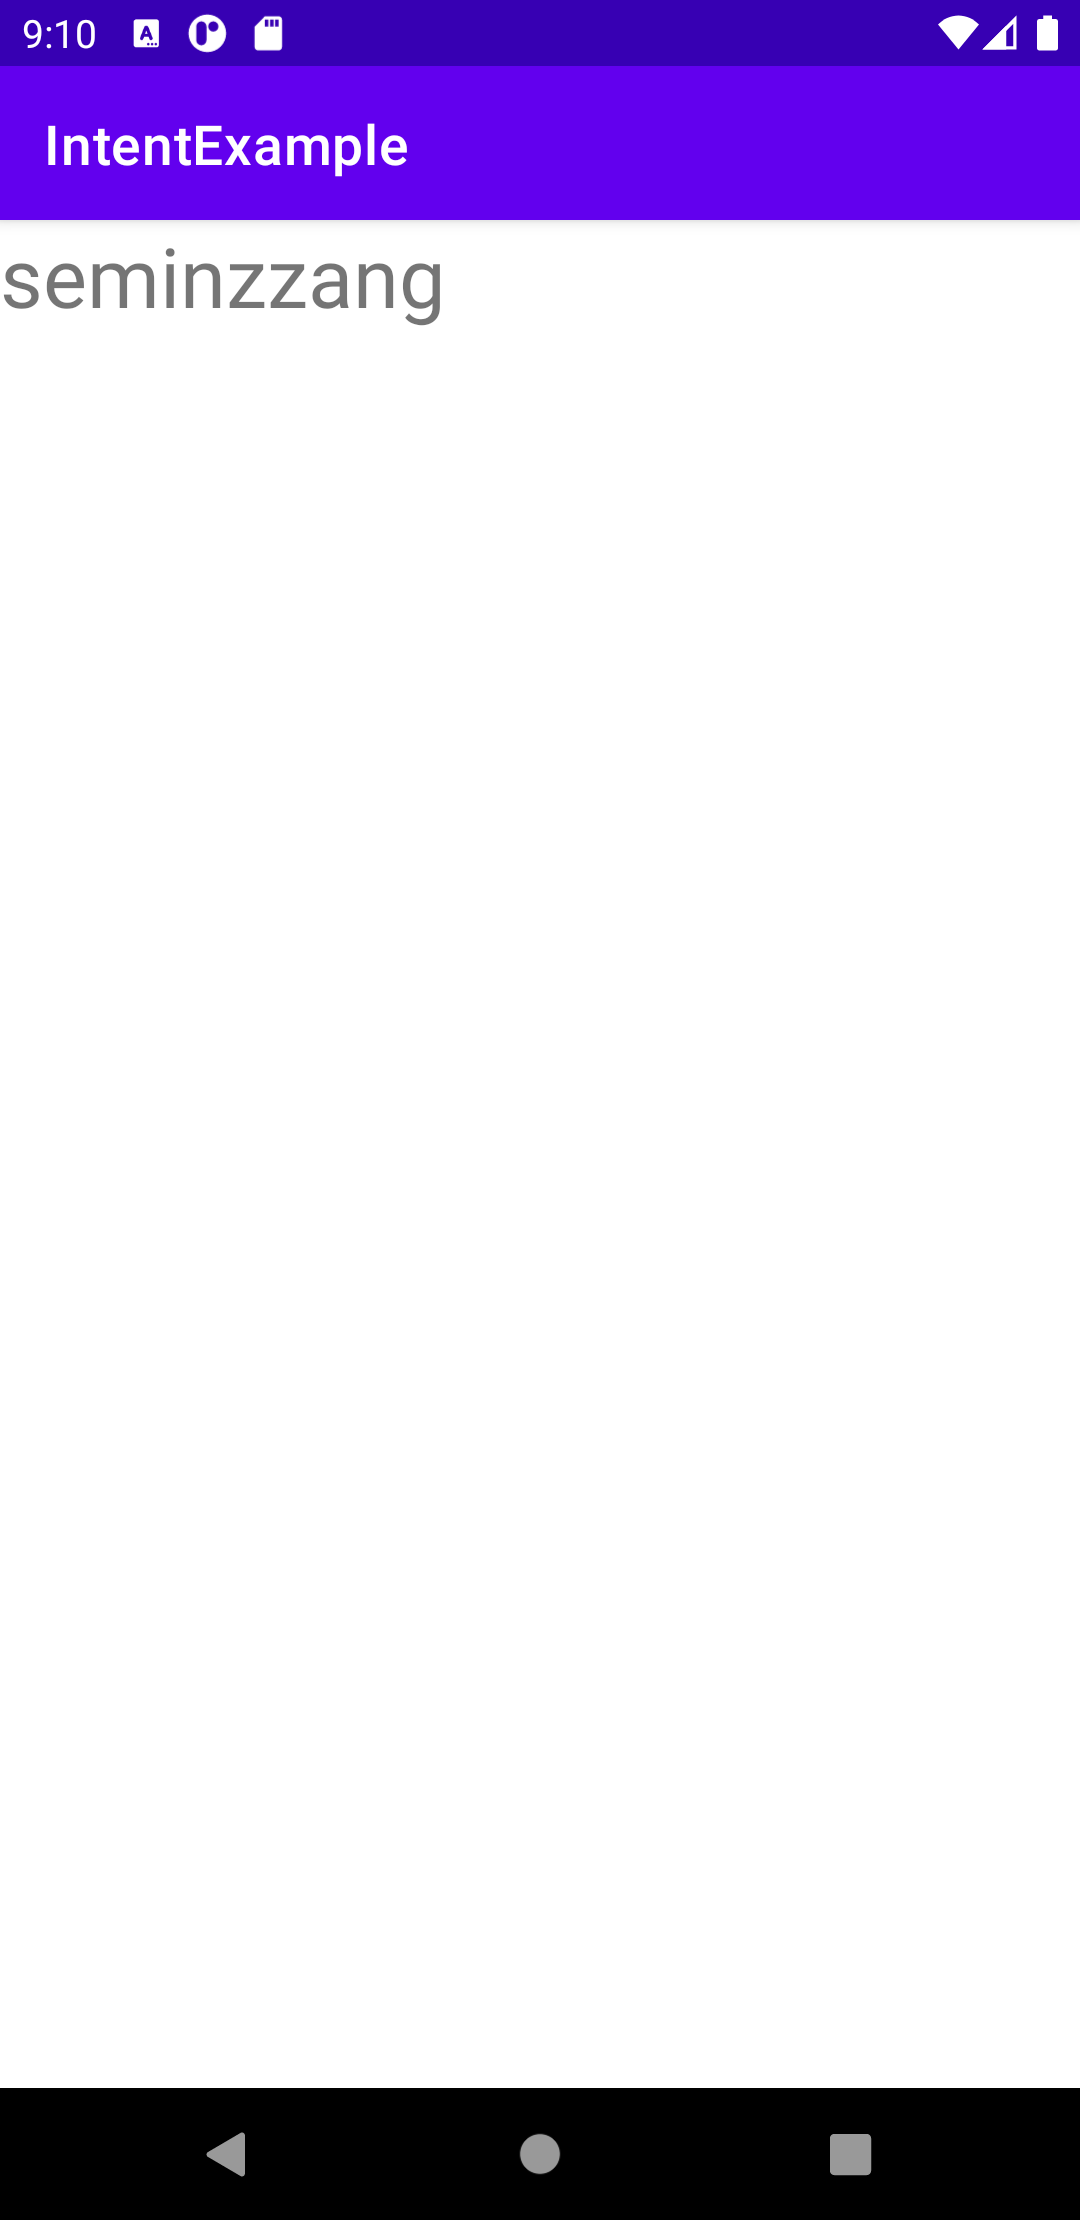
<TextView
android:id="@+id/tv_sub"
android:layout_width="wrap_content"
android:layout_height="wrap_content"
android:textSize="30sp"
android:text="서브 액티비티 도착"
/>
</LinearLayout>
|
cs |
서브액티비티.java
|
1
2
3
4
5
6
7
8
9
10
11
12
13
14
15
16
17
18
19
20
21
22
23
24
25
|
package com.example.intentexample;
import androidx.appcompat.app.AppCompatActivity;
import android.content.Intent;
import android.os.Bundle;
import android.widget.TextView;
public class SubActivity extends AppCompatActivity {
private TextView tv_sub;
@Override
protected void onCreate(Bundle savedInstanceState) {
super.onCreate(savedInstanceState);
setContentView(R.layout.activity_sub);
tv_sub = findViewById(R.id.tv_sub);
Intent intent = getIntent();
String str = intent.getStringExtra("str");
tv_sub.setText(str);
}
}
|
cs |
이번 시간에는 Intent, ImageView, Toast에 대해서 배웠다.
Intent의 개념이 잘 이해가 되지 않아, 구글링으로 찾아보면서 새로운 정보들을 알 수 있었다.
Intent는 여러개의 생성자를 갖고 있다.
Intent () //디폴트 생성자
Intent ( Intent o ) //복사 생성자
Intent ( Context packageContext, Class<?> cls ) // 가장 많이 사용하는 생성자
Context packageContext : 액티비티 클래스를 구현하는 컨텍스트
Class<?> cls : 호출할 액티비티의 클래스
Intent는 명시적 인텐트와 암시적 인텐트로 구분할 수 있다고 한다.
명시적 인텐트는 호출될 대상을 확실히 알 수 있는 경우 사용하고,
암시적 인텐트는 호출될 대상이 달라질 수 있는 경우에 사용한다고 한다.
오늘은 강의에서 배운 명시적 인텐트를 정리할 것이다.
1. Intent : 화면 전환 기능
1) startActivity(intent) : 선언한 인텐트로 액티비티 이동을 하는 함수.
2) intent.putExtra("str", str) : 인텐트에 값을 넣는 기능.
첫 번째 인자는 값을 주고 받을 때 사용할 별명을 나타내고,
두 번째 인자는 실제 넣을 값을 의미한다.
※메인액티비티와 서브액티비티에서 동일한 별명을 사용하여야 한다.
3) getIntent() : 인텐트가 있는지 확인하고 있으면 그 인텐트를 받는다.
4) intent.getStringExtra("str") : 인텐트에 있는 값을 받는 기능.
여기서는 String값을 입력하였으므로 getStringExtra를 사용한다.
2. ImageView : 이미지 출력 기능
1) src : 설정할 이미지가 저장되어 있는 링크. 기본적으로 @mipmap 이 있다.
3. Toast : 짧은 메세지를 노출시킨 후 사라지는 팝업인 토스트 메세지를 보여주는 기능.
1) makeText( getApplication(), "seminzzang", Toast.LENGTH_SHORT).show() : 토스트 메세지 출력.
첫 번째 인자는 액티비티 클래스를 구현하는 컨텍스트로, 인텐트의 첫 번째 인자와 같다.
두 번째 인자는 토스트 메세지에 나타낼 문자열이다.
세 번째 인자는 토스트 메세지의 나타나는 시간을 의미한다.
마지막에 .show()를 입력해주어야 앱에 토스트 메세지가 출력된다.
'Legacy' 카테고리의 다른 글
| [안드로이드 스튜디오 독학#5] SharedPreferences (0) | 2021.01.08 |
|---|---|
| [안드로이드 스튜디오 독학#4] ListView (0) | 2021.01.05 |
| [안드로이드 스튜디오 독학#2-1] 또 다른 OnClick 구현 (0) | 2021.01.05 |
| [안드로이드 스튜디오 독학#2] EditText & Button (0) | 2021.01.04 |
| [안드로이드 스튜디오 독학#1] TextView (2) | 2021.01.04 |